Batteries and banks
Lead acid or LiFePO4, single or in series for a 24V or 48V bank.
Camper and van
A camper installation is a 12V system with a 230V part on top: battery, charge controller, solar panels, DC-DC charger, inverter and shore power. WireElectric lets you draw that diagram with real devices and checks every connection.
Drawing and checking is free and works without an account.
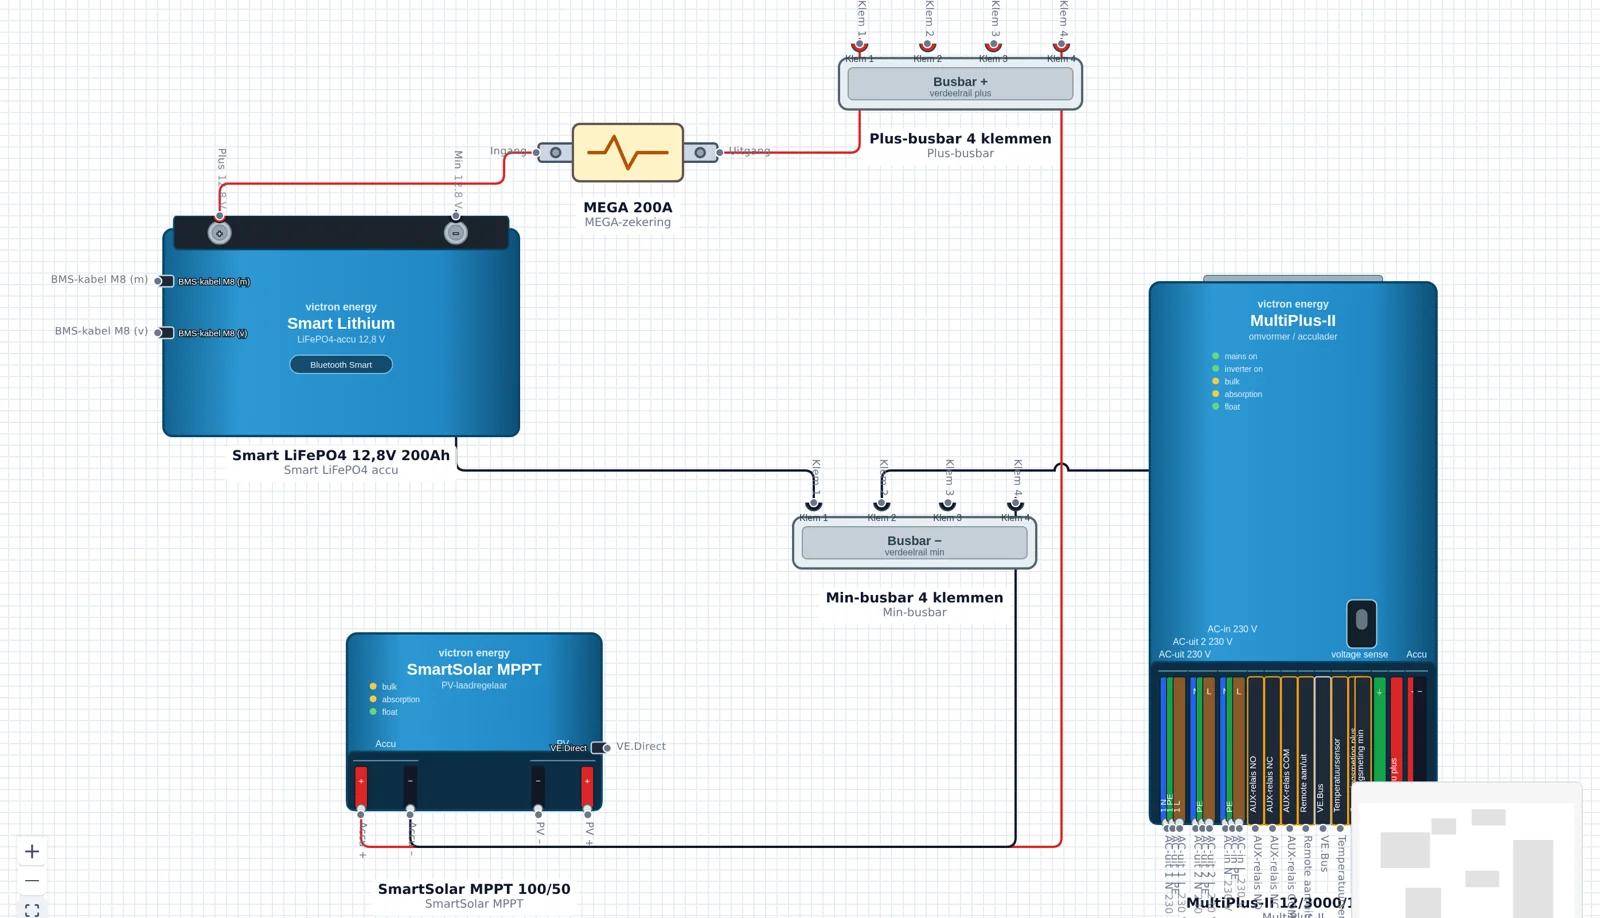
Every part comes from the component library with real ports, voltages and currents.
Lead acid or LiFePO4, single or in series for a 24V or 48V bank.
Panels in series or parallel to a charge controller at the right voltage.
Charge controllers between solar and battery, including Victron models.
Charging from the alternator or starter battery over a DC-DC charger.
From 12V or 24V to 230V for your onboard appliances.
Mains connection with battery charger, RCD and circuit groups.
Lighting, pump, fridge and other loads with a fuse per circuit.
Sockets and fixed connections behind your inverter or shore power.
At 12V voltage drop is the main issue: three metres to a 2000W inverter needs a very different cross-section than three metres to an LED light. Every connection is calculated from current, length and cross-section.
Every battery branch needs a main fuse matched to the cable, not just to the load. You immediately see where a MEGA, ANL or MIDI fuse is missing.
Shore power, inverter and residual current device belong together. The app determines the voltage per net and warns as soon as a 230V load hangs on the DC side.
WireElectric calculates along as you connect parts and reports what does not add up.
The required cross-section follows from current, length and allowed voltage drop.
A fuse that does not match the cable or the device is flagged.
Per cable you see the loss in volts and percent.
Ports that do not match in voltage or type raise a warning.
The library contains the devices found in almost every camper, with their real terminals:
Place your service battery (AGM or LiFePO4) with positive and negative busbar and the main fuse in between.
SmartSolar MPPT for the panels, an Orion-Tr Smart or DC-DC charger from the starter battery, and a MultiPlus for shore power.
Fridge, water pump, lighting and the 230V part with breaker and RCD behind the inverter output.
Work through the findings, fill in cable lengths and save or print the diagram as a PDF.
Every calculator answers one question about your installation. WireElectric then runs the same calculations for every connection in your complete diagram.
Find the cross-section that suits your 12V or 24V system, based on current, length and voltage drop.
View →Find a suitable fuse for your circuit, including a check on whether the cable can carry it.
View →Check how much voltage you lose over a cable and what reaches your load.
View →Work out how much battery capacity in Ah you need for your daily use and autonomy.
View →Calculate how long a battery can power a load, including the usable share and inverter losses.
View →Convert power straight to current at 12V, 24V, 48V or 230V.
View →Work out indicatively how many Wp of solar panels your daily consumption needs.
View →Space is tight in a camper, cable runs are long and the battery is the heart of everything. That is exactly where things go wrong: a 12V cable to the inverter that is too thin, a fuse that does not protect the cable, or a 230V circuit without earth. Drawing first shows those mistakes before you pick up the crimping tool.
You can start drawing without an account.
Open WireElectric